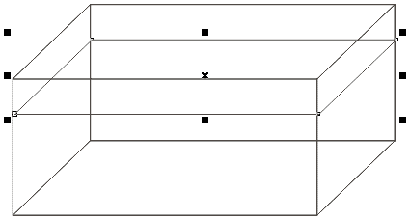
1. Open Corel DRAW. Draw Rectangle with Rectangle Tool.
Note: It is expected that you have finished with the beginners and intermediate projects when you start with advance, as we do not repeat the small instructions.
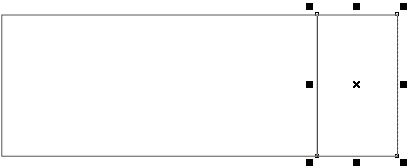
2. Select the middle left point of the rectangle with pick tool. Drag it to the right and right click to get the copy of small rectangle.
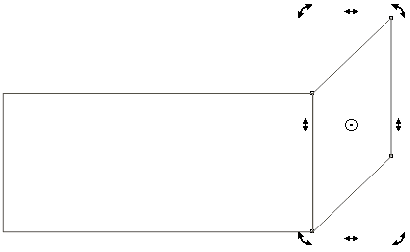
3. Double click small rectangle and skew it upwards by dragging it's right middle point.
4. Make a duplicate of right skewed rectangle and place it at the left corner of the main big rectangle.
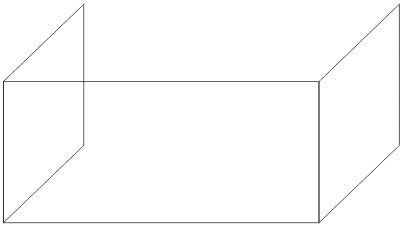
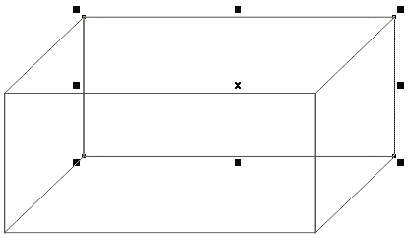
5. Make a duplicate of the main big rectangle and place it at the back to complete four sides of the tank.
6. Using Bazier Tool, create the rectangle little below the top of the tank to form the upper surface of water.
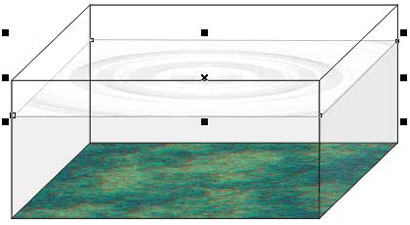
7. Select the rectangle of water surface. Apply texture fill. You can change the color of the texture.
Texture Library > Sample 5
Texture list > Hub Cap
8. Create the bottom of the tank similarly and apply texture fill.
Choose the texture of your choice.
9. Create the front and the left side surface of the water. Using Interactive Transparency Tool make these surface semitransparent.
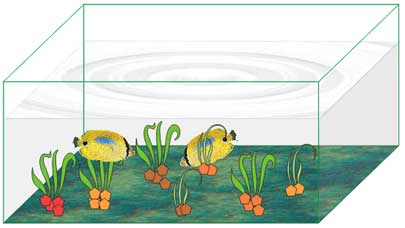
10. To make the tank more realistic, change the border color to green by right clicking on the green color. Use symbols to fill the objects in the tank. Send the objects back to the water surface using
Arrange > Order
Read more: http://www.webdesign.org/vector-graphics/coreldraw/fish-tank.3436.html#ixzz11MPIjzE2
ไม่มีความคิดเห็น:
แสดงความคิดเห็น